No edit summary Tags: Visual edit apiedit |
Aprogergely (talk | contribs) mNo edit summary |
||
| (16 intermediate revisions by 6 users not shown) | |||
| Line 1: | Line 1: | ||
| + | {{Town infobox |
||
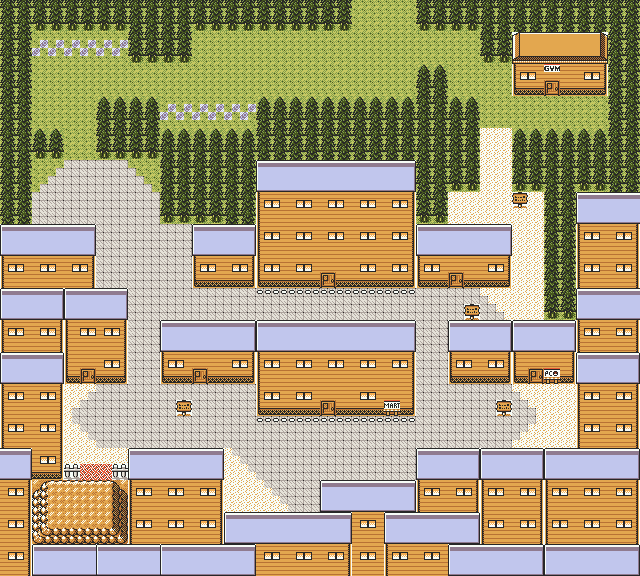
| − | [[File:Spurge.png|thumb|220x220px]]{{Town infobox|name = Spurge city|region = Naljo|north = Route 75|south = Mound Cave|image = Spurge.png}}'''Spurge City''' is a city in [[Naljo]], north of Mound Caves and south of route 74. |
||
| + | |name = Spurge City |
||
| + | |image = Spurge_City.png |
||
| + | |slogan = The city where anything can happen! |
||
| + | |region = Naljo |
||
| + | |north = Route 74 |
||
| + | |south = Mound Cave |
||
| + | |gym = Spurge Gym |
||
| + | |gymno = 8 |
||
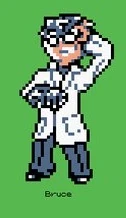
| + | |leadervs = Bruce.jpg |
||
| + | |leader = Bruce |
||
| + | |gymtype = Steel |
||
| + | |badge = Naljo |
||
| + | |map = Spurgecitymap.png |
||
| + | }} |
||
| + | '''Spurge City''' is a city in [[Naljo]]. It is located north of [[Mound Cave]] and south of [[Route 74]]. |
||
| + | |||
| + | The city is very large and still growing rapidly, much to the dismay of some of its inhabitants. |
||
| + | |||
| + | '''Spurge City''' is the location of the [[Spurge Orphanage|Orphanage]], as well as [[Spurge Casino]], in which the player can earn coins in mini games to exchange for money and prizes. |
||
| + | |||
| + | The city also contains an exceptionally large PokéMart. Here, the player can buy fast food items for their Pokémon; open a bank account, which automatically banks some money after each trainer battle (much like the mother in G/S/C); and exchange [[Gold Tokens]] for prizes. |
||
| + | |||
| + | ==Items== |
||
| + | {{ItemTable}} |
||
| + | {{Itemlist|TM39<br>(Swift)|Speak to the boy to the North-East [[File:Spurge_City_-_TM39_Swift.png|thumb]]|Prism = yes}} |
||
| + | {{Itemlist|TM67<br>(Tri Attack)|Speak to the scientist in Apartment 2-D [[File:Spurge_City_-_TM67_Tri_Attack.png|thumb]]|Prism = yes}} |
||
| + | {{Itemlist|[[Spurge Orphanage|Orphan Card]]|-|Prism = yes}} |
||
| + | {{Itemlist|Coin Case|-|Prism = yes}} |
||
| + | {{Itlistfoot}} |
||
| + | {{Clr}} |
||
| + | ==PokéMart== |
||
| + | {| class="roundy" align="left" style="border: 2px solid #3c4047; background: #3c4047; font-size:12px; margin-right: 5px; margin-bottom: 5px;" |
||
| + | !align=center style="background:#d0d2d7; color:black; border-top-left-radius:0.3em;" | Item |
||
| + | ! align="center" style="background:#d0d2d7;border-top-right-radius:0.3em;" | Price |
||
| + | |- |
||
| + | |align="center" style="background:white;" | [[Potion]] |
||
| + | |align="center" style="background:white;" | {{Pdollar}}300 |
||
| + | |- |
||
| + | |align="center" style="background:white;" | [[Super Potion]] |
||
| + | |align="center" style="background:white;" | {{Pdollar}}700 |
||
| + | |- |
||
| + | | align="center" style="background:white;"| [[Antidote]] |
||
| + | |align="center" style="background:white;" | {{Pdollar}}100 |
||
| + | |- |
||
| + | | align="center" style="background:white;"| [[Burn Heal]] |
||
| + | |align="center" style="background:white;" | {{Pdollar}}250 |
||
| + | |- |
||
| + | | align="center" style="background:white;"| [[Ice Heal]] |
||
| + | |align="center" style="background:white;" | {{Pdollar}}250 |
||
| + | |- |
||
| + | | align="center" style="background:white;"| [[Awakening]] |
||
| + | |align="center" style="background:white;" | {{Pdollar}}250 |
||
| + | |- |
||
| + | | align="center" style="background:white;"| [[Paralyze Heal]] |
||
| + | |align="center" style="background:white;" | {{Pdollar}}200 |
||
| + | |- |
||
| + | | align="center" style="background:white;"| [[Moomoo Milk]] |
||
| + | |align="center" style="background:white;" | {{Pdollar}}900 |
||
| + | |- |
||
| + | !colspan="3" align=center style="background:#d0d2d7;padding:3px; vertical-align:top; border-bottom-left-radius:0.3em; border-bottom-right-radius:0.3em; color:black;"| |
||
| + | |} |
||
| + | {| class="roundy" align="left" style="border: 2px solid #3c4047; background: #3c4047; font-size:12px; margin-right: 5px; margin-bottom: 5px;" |
||
| + | !align=center style="background:#d0d2d7; color:black; border-top-left-radius:0.3em;" | Item |
||
| + | ! align="center" style="background:#d0d2d7;border-top-right-radius:0.3em;" | Price |
||
| + | |- |
||
| + | |align="center" style="background:white;" | [[X Attack]] |
||
| + | |align="center" style="background:white;" | {{Pdollar}}500 |
||
| + | |- |
||
| + | |align="center" style="background:white;" | [[X Defend]] |
||
| + | |align="center" style="background:white;" | {{Pdollar}}550 |
||
| + | |- |
||
| + | |align="center" style="background:white;" | [[X Speed]] |
||
| + | |align="center" style="background:white;" | {{Pdollar}}350 |
||
| + | |- |
||
| + | |align="center" style="background:white;" | [[X Special]] |
||
| + | |align="center" style="background:white;" | {{Pdollar}}350 |
||
| + | |- |
||
| + | |align="center" style="background:white;" | [[X Sp. Def]] |
||
| + | |align="center" style="background:white;" | {{Pdollar}}350 |
||
| + | |- |
||
| + | |align="center" style="background:white;" | [[X Accuracy]] |
||
| + | |align="center" style="background:white;" | {{Pdollar}}950 |
||
| + | |- |
||
| + | | align="center" style="background:white;"| [[Guard Special]] |
||
| + | |align="center" style="background:white;" | {{Pdollar}}700 |
||
| + | |- |
||
| + | | align="center" style="background:white;"| [[Dire Hit]] |
||
| + | |align="center" style="background:white;" | {{Pdollar}}650 |
||
| + | |- |
||
| + | !colspan="3" align=center style="background:#d0d2d7;padding:3px; vertical-align:top; border-bottom-left-radius:0.3em; border-bottom-right-radius:0.3em; color:black;"| |
||
| + | |} |
||
| + | {| class="roundy" align="left" style="border: 2px solid #3c4047; background: #3c4047; font-size:12px; margin-right: 5px; margin-bottom: 5px;" |
||
| + | !align=center style="background:#d0d2d7; color:black; border-top-left-radius:0.3em;" | Item |
||
| + | ! align="center" style="background:#d0d2d7;border-top-right-radius:0.3em;" | Price |
||
| + | |- |
||
| + | |align="center" style="background:white;" | [[PokéBall]] |
||
| + | |align="center" style="background:white;" | {{Pdollar}}200 |
||
| + | |- |
||
| + | |align="center" style="background:white;" | [[Great Ball]] |
||
| + | |align="center" style="background:white;" | {{Pdollar}}600 |
||
| + | |- |
||
| + | | align="center" style="background:white;"| [[Escape Rope]] |
||
| + | |align="center" style="background:white;" | {{Pdollar}}550 |
||
| + | |- |
||
| + | | align="center" style="background:white;"| [[Repel]] |
||
| + | |align="center" style="background:white;" | {{Pdollar}}350 |
||
| + | |- |
||
| + | | align="center" style="background:white;"| [[Poké Doll]] |
||
| + | |align="center" style="background:white;" | {{Pdollar}}1000 |
||
| + | |- |
||
| + | !colspan="3" align=center style="background:#d0d2d7;padding:3px; vertical-align:top; border-bottom-left-radius:0.3em; border-bottom-right-radius:0.3em; color:black;"| |
||
| + | |} |
||
| + | {| class="roundy" align="left" style="border: 2px solid #3c4047; background: #3c4047; font-size:12px; margin-right: 5px; margin-bottom: 5px;" |
||
| + | !align=center style="background:#d0d2d7; color:black; border-top-left-radius:0.3em;" | Item |
||
| + | ! align="center" style="background:#d0d2d7;border-top-right-radius:0.3em;" | Price |
||
| + | |- |
||
| + | |align="center" style="background:white;" | [[Burger]] |
||
| + | |align="center" style="background:white;" | {{Pdollar}}500 |
||
| + | |- |
||
| + | |align="center" style="background:white;" | [[Fries]] |
||
| + | |align="center" style="background:white;" | {{Pdollar}}250 |
||
| + | |- |
||
| + | |align="center" style="background:white;" | [[Soda Pop]] |
||
| + | |align="center" style="background:white;" | {{Pdollar}}300 |
||
| + | |- |
||
| + | !colspan="3" align=center style="background:#d0d2d7;padding:3px; vertical-align:top; border-bottom-left-radius:0.3em; border-bottom-right-radius:0.3em; color:black;"| |
||
| + | |} |
||
| + | |||
| + | {{Clr}} |
||
| + | |||
| + | ==Token Exchange== |
||
| + | {| class="roundy" align="left" style="border: 2px solid #3c4047; background: #3c4047; font-size:12px; margin-right: 5px; margin-bottom: 5px;" |
||
| + | !align=center style="background:#d0d2d7; color:black; border-top-left-radius:0.3em;" | Item |
||
| + | ! align="center" style="background:#d0d2d7;border-top-right-radius:0.3em;" | Tokens |
||
| + | |- |
||
| + | |align="center" style="background:white;" | [[Megaphone]] |
||
| + | |align="center" style="background:white;" | 2 Tokens |
||
| + | |- |
||
| + | |align="center" style="background:white;" | [[Protein]] |
||
| + | |align="center" style="background:white;" | 2 Tokens |
||
| + | |- |
||
| + | |align="center" style="background:white;" | [[ConfuseGuard]] |
||
| + | |align="center" style="background:white;" | 3 Tokens |
||
| + | |- |
||
| + | !colspan="3" align=center style="background:#d0d2d7;padding:3px; vertical-align:top; border-bottom-left-radius:0.3em; border-bottom-right-radius:0.3em; color:black;"| |
||
| + | |} |
||
| + | |||
| + | {{Clr}} |
||
| + | |||
| + | ==Pokémon== |
||
| + | ''To be Added'' |
||
| + | ---- |
||
| + | |||
| + | {{Naljo}} |
||
[[Category:Locations]] |
[[Category:Locations]] |
||
[[Category:Cities]] |
[[Category:Cities]] |
||
[[Category:Naljo]] |
[[Category:Naljo]] |
||
| + | [[Category:Pokémon Prism]] |
||
Revision as of 11:07, 6 September 2019
| |||||||||||||
| |||||||||||||
Spurge City Gym - Naljo Gym #8
| |||||||||||||
Connecting locations
| |||||||||||||
| Location File:Spurgecitymap.png Location of Spurge City in Naljo. | |||||||||||||
Spurge City is a city in Naljo. It is located north of Mound Cave and south of Route 74.
The city is very large and still growing rapidly, much to the dismay of some of its inhabitants.
Spurge City is the location of the Orphanage, as well as Spurge Casino, in which the player can earn coins in mini games to exchange for money and prizes.
The city also contains an exceptionally large PokéMart. Here, the player can buy fast food items for their Pokémon; open a bank account, which automatically banks some money after each trainer battle (much like the mother in G/S/C); and exchange Gold Tokens for prizes.
Items
| Item | Location | Games | |
|---|---|---|---|
| TM39 (Swift) |
Speak to the boy to the North-East |
Prism | |
| TM67 (Tri Attack) |
Speak to the scientist in Apartment 2-D |
Prism | |
| Orphan Card | - | Prism | |
| Coin Case | - | Prism | |
PokéMart
| Item | Price | |
|---|---|---|
| Potion | ||
| Super Potion | ||
| Antidote | ||
| Burn Heal | ||
| Ice Heal | ||
| Awakening | ||
| Paralyze Heal | ||
| Moomoo Milk | ||
| Item | Price | |
|---|---|---|
| X Attack | ||
| X Defend | ||
| X Speed | ||
| X Special | ||
| X Sp. Def | ||
| X Accuracy | ||
| Guard Special | ||
| Dire Hit | ||
| Item | Price | |
|---|---|---|
| PokéBall | ||
| Great Ball | ||
| Escape Rope | ||
| Repel | ||
| Poké Doll | ||
| Item | Price | |
|---|---|---|
| Burger | ||
| Fries | ||
| Soda Pop | ||
| Item | Price | |
|---|---|---|
| Burger | ||
| Fries | ||
| Soda Pop | ||
Token Exchange
| Item | Tokens | |
|---|---|---|
| Megaphone | 2 Tokens | |
| Protein | 2 Tokens | |
| ConfuseGuard | 3 Tokens | |
Pokémon
To be Added
| Naljo | ||||||||
|---|---|---|---|---|---|---|---|---|
|
| ||||||||
| ||||||||